101 Alfa spider, more or less intact
If you're reading this document, then you are either curious about our sill kit which replaces the stock sill assembly because yours is rusted to death, or you've already purchased it and you're wondering how to make this newly acquired stack of parts into a functional piece of automotive structure. Whatever the case may be, this guide will help you.
This kit is designed to look like the stock setup, but be much stronger, easier to install, and have fewer parts. Its secret is in the very strong rectangular section made from .125" steel tubing coupled with the middle sill and upper stiffener which are made from 16 GA. hot rolled steel. The resulting triangle that these pieces form creates a VERY stiff sill and therefore a chasis with less flex than the stock setup.
If you don't care about maintaining the "stock" looking appearance from under your car, you can omit the inner sill altogether and weld the frame sections and floors directly to this tube for an even stiffer chasis. All you have to do is to weld flanges to the tube to catch the lower lip of the rocker and upper sill, and weld covers over each end. It makes a very good place to anchor a roll cage should you happen to be building a racer.
Now, on to business. We dragged in one of our rusted out cars we use for patterns and reference measurements and put in a kit, taking pictures of all the pertinent areas and steps. Because this car is never again going to see the open road, we didn't weld the kit in place, but rather took apart most of the sill assembly and offered up all of the parts so you can actually see where they go. Then, we took the same kit and assembled it on a work bench with a few tacks so you can see what it looks like out of the car.
It should be noted that before you cut up your own car that you should temporarily weld in some cross bracing so the car doesn't turn into a banana when you cut all the support out from under it. It would be more than a shame to get the sills welded in and then not be able to close the doors anymore. Which is what invariably would happen without proper bracing.
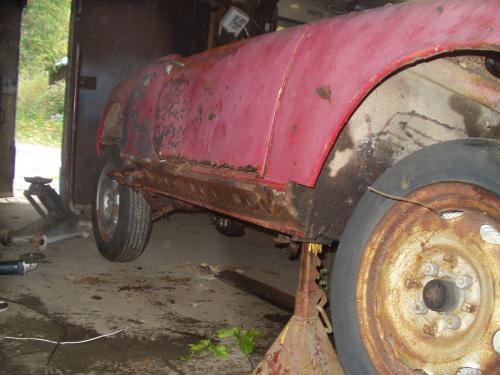
Below is a picture of the car we started with before it went "Under the blade."

101 Alfa spider, more or less intact
The next shot shows the car after the outer rocker panel was removed. The factory outer stiffener is still there, more or less. In case you haven't already guessed, we'll be working on the right hand side of the car for the duration of this article.

101 With Rocker Removed
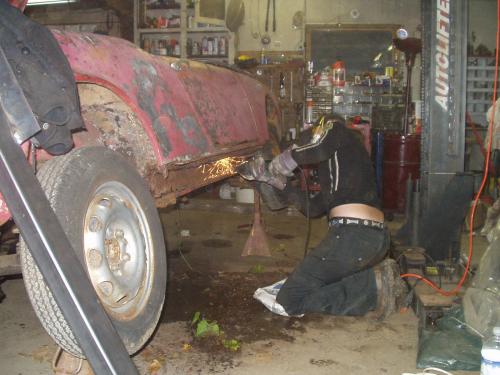
Marie-Claire can be seen here cutting out the remains of the factory inner stiffeners. If you're not accustomed to welding, grinding, cutting, and sometimes eating metal, then have someone else install this kit. It's not a "bolt on" and it's not for beginners.

Cleaning out the inner sill
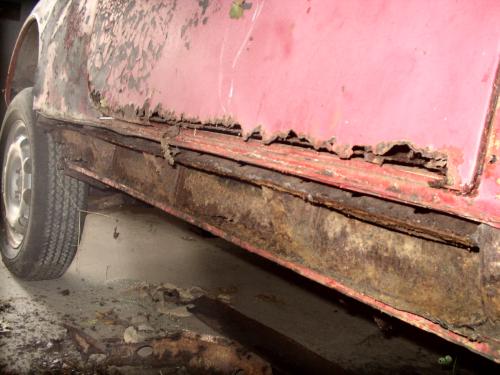
This is what things looked like after all the remnants of the factory parts were stripped out. Obviously the inner sill would be removed too if this were to be an actual restoration, but the purpose of this document is strictly to show how the sill goes together so the factory inner sill will do just fine.

The gutted sill area
We accept ![]()
![]()
![]() .
.
Prices in USD
![]() Note to our American customers: There are no additional customs charges or tarrifs on orders shipping to the states as we are all covered by NAFTA
Note to our American customers: There are no additional customs charges or tarrifs on orders shipping to the states as we are all covered by NAFTA ![]()